Pages

Monday, April 12, 2010

Bookend

We have an open bookshelf which is not fully filled with books, and on the brink there was nothing to keep the books standing. This inspired me to create a bookend to maintain order on this shelf.

The plan was a "pushing man" holding the books. For this I needed two pieces of flat wood joined together in 90 degrees and a figure who is connected to these pieces.

I wanted a strong holding for the joint, but I did not want it to be visible. So I decided to use a blind dovetail join.

Full blind dovetail join


This was one of my first joints, so it took a long time (almost a whole afternoon) to create proper shape of the pieces, but finally they fit quite well.

When I had the joint I just needed a figure. I wanted a simple, not too detailed one who is just struggling with the books. I glued together some pieces of wood and carved a simple figure. When it was ready I glued his legs to the base and his hands to the vertical part of the bookend.

The following picture shows it in action:

Bookend

Friday, February 12, 2010

Marking Gauge

After some small projects I realized that exact markings are very important in woodworking. It can save a lot of time especially if I have to correct some error because of the "lazy" sketch drawings. So I decided to create some layout tools to make the work easier. I did not want to go to the first shop an buy a set of layout tools because I enjoy working more with the ones I made.

The marking gauge was the first choice to create. I found a detailed article in the Popular Woodworking magazine about this tool.

I found a piece of beech tree and followed the construction description of the download-able PDF version. For the pin I used a simple sharped nail. I was a bit afraid of loosing it's edge soon, but after several tests it still had it.

Marking gauge

Sunday, September 13, 2009

Keepsake Box

While I was surfing on the Internet I found the following Keepsake box. I liked the closing system of this box and also found it quite simple to create a similar one. I did not want to make an exact copy of the original one, I wanted a bit higher one and to decorate the top with some carving.

Creating the dovetail sliding seemed very easy on the video, but I do not have a router table, so I had to figure out something else. Firstly I wanted to create this by cutting out the dovetail hole with a saw and clean out it wit chisels, but soon I realized that I didn't have enough manual skill to make it perfectly flat to allow the other part sliding smoothly in it. So I decided to make the top from 3 parts and glue them together. It also took a while to plane the parts of the top in the exact angle to fit well, but it was much easier and flattering than using chisels.

When I was ready with the top and the bottom, I created the corners and the remaining part of the dovetail from a different type of wood to have some pattern of the materials.

Finally I carved a small flower pattern to the top of the box and finished with varnish. With the carving on the top of the box has the following looking:

Keepsake box


One more shot from a different angle:


Finally an opened view:

Wednesday, August 12, 2009

Jewelry Box

Since I have started working with wood my girlfriend was always pushing me to create a jewelry box for her, even if she does not have too much jewelries. I thought this is a compulsory task for every man who has started to do anything of wood.

I did not have any experience with box creating and joinery so I asked some help from an experienced one of my relatives and also had proper tools for cutting and planing. So he helped me to create the box.

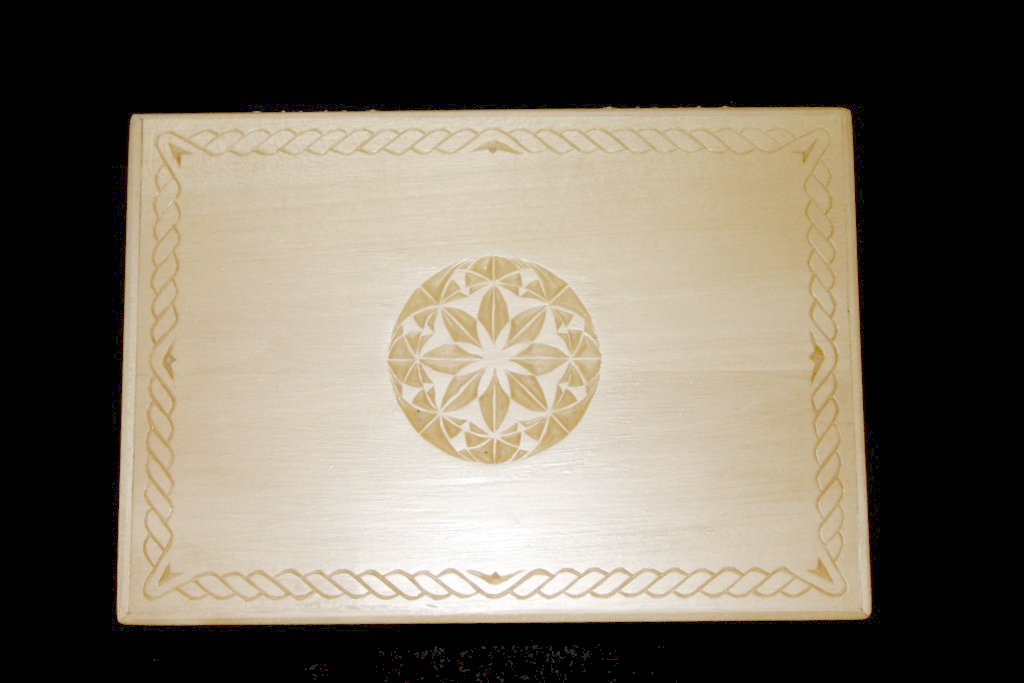
When it was ready I just wanted to put some simple but nice carving on the top. I draw several patterns and borders and finally I chose this one:

Carved jewelry box


I also covered the bottom of the box with some soft material:


And also the drawers:


Finally I put a hinge between the body and the top: