Pages

Showing posts with label carving. Show all posts

Tuesday, January 29, 2013

Toy Mouse

Nothing special just a small wooden toy to my daughter. 


I had a huge trunk of cherry tree, which was cut out from the garden last year. After several hours of sawing, finally I cut out a small block, and started carving a mouse shape. With chisels I made some rough work, but most of the work made by using knifes. 


When finished the carving it was sanded to have a smooth surface. The noose, mustache and eyes were burned with a piece of red hot iron. 

Monday, October 25, 2010

Mailbox

This mailbox is going to be a gift for my girlfriend's parents . They needed a relatively big one to be able to swallow an A4 sized envelope and several newspapers.


Firstly, I had to cut the lumber into proper size. The corners are jointed in 45 degree angles, so I planed the edges into 45 degree. It took some time until I got them to fit correctly.


When it was ready I glued the pieces together and the maibox had its shape:


Then I put the roof on the top of the mailbox:


When it had its final form, I shaped out the nameplate:


Then carved the name and address into the nameplate:


To get more contrast for the text, it was burnt with a soldering-iron.

When it was ready, only finishing was left. It was an UV resistant outdoor stains in 2 layer, I hope it will be good for a while because it had a terrible smell. Now it looks like this:


Originally It had a leg, but it was easier to use a squared iron to fix it to its final place.

Monday, April 12, 2010

Bookend

We have an open bookshelf which is not fully filled with books, and on the brink there was nothing to keep the books standing. This inspired me to create a bookend to maintain order on this shelf.

The plan was a "pushing man" holding the books. For this I needed two pieces of flat wood joined together in 90 degrees and a figure who is connected to these pieces.

I wanted a strong holding for the joint, but I did not want it to be visible. So I decided to use a blind dovetail join.

Full blind dovetail join


This was one of my first joints, so it took a long time (almost a whole afternoon) to create proper shape of the pieces, but finally they fit quite well.

When I had the joint I just needed a figure. I wanted a simple, not too detailed one who is just struggling with the books. I glued together some pieces of wood and carved a simple figure. When it was ready I glued his legs to the base and his hands to the vertical part of the bookend.

The following picture shows it in action:

Bookend

Sunday, September 13, 2009

Keepsake Box

While I was surfing on the Internet I found the following Keepsake box. I liked the closing system of this box and also found it quite simple to create a similar one. I did not want to make an exact copy of the original one, I wanted a bit higher one and to decorate the top with some carving.

Creating the dovetail sliding seemed very easy on the video, but I do not have a router table, so I had to figure out something else. Firstly I wanted to create this by cutting out the dovetail hole with a saw and clean out it wit chisels, but soon I realized that I didn't have enough manual skill to make it perfectly flat to allow the other part sliding smoothly in it. So I decided to make the top from 3 parts and glue them together. It also took a while to plane the parts of the top in the exact angle to fit well, but it was much easier and flattering than using chisels.

When I was ready with the top and the bottom, I created the corners and the remaining part of the dovetail from a different type of wood to have some pattern of the materials.

Finally I carved a small flower pattern to the top of the box and finished with varnish. With the carving on the top of the box has the following looking:

Keepsake box


One more shot from a different angle:


Finally an opened view:

Wednesday, August 12, 2009

Jewelry Box

Since I have started working with wood my girlfriend was always pushing me to create a jewelry box for her, even if she does not have too much jewelries. I thought this is a compulsory task for every man who has started to do anything of wood.

I did not have any experience with box creating and joinery so I asked some help from an experienced one of my relatives and also had proper tools for cutting and planing. So he helped me to create the box.

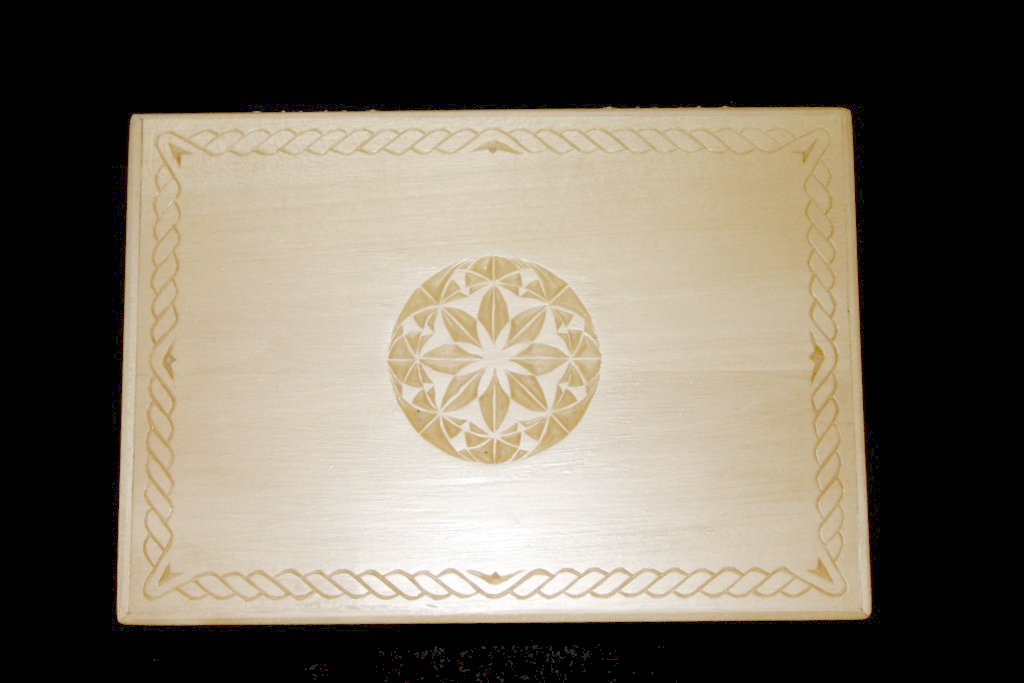
When it was ready I just wanted to put some simple but nice carving on the top. I draw several patterns and borders and finally I chose this one:

Carved jewelry box


I also covered the bottom of the box with some soft material:


And also the drawers:


Finally I put a hinge between the body and the top:

Wednesday, March 25, 2009

Salad Spoons

After my previous spoon and the paddle I realized that these kind of things are not really usable, at least nowadays, and I don't have place for them in my flat, because they are not really in harmony with the style of it. I wanted to make something more useful and usable thing.

My girlfriend is a vegetarian and she would be pleased with a pair of salad spoons, so I had the plan. I just needed some material to do it. I had only some soft wood for carving, but those were not good for everyday usage, I wanted some harder wood. I remembered that last year my parents, who are living on the countryside, had cut down some bigger branches from their nut tree and these branches are just drying under a roof and waiting to be burnt . So I thought some of them would be good for this task. Next time when I visited them, I checked these branches and I found a trunk which can provide me a pair of spoons. I cut into two pieces and draw the design of the spoons on the wood. With a jigsaw I cut the shape of the spoons following the lines and with knives I carved to the final shape. At the end I sanded them and covered with some paraffin oil.

Wooden salad spoons

Wednesday, March 11, 2009

Wooden Spoon

While I was surfing on the Internet I saw a lot of nicely carved wooden spoons. I decided to create one. I took a piece of alder wood and created a simple design.

Tuesday, February 10, 2009

Paddle

I am not a big folk fan, but a paddle could be a good task for practice. The material was shaped, I just had to do the carving. I searched a lot on the Internet for patterns and samples. When I had a larger collection of the patterns I tried to draw a composition of folk motives on the surface of the wood. This was the hardest part, the carving was much easier than I expected.

Finally I had this:


And the other side:

Tuesday, January 20, 2009

Glass Pads

After warming up with the wooden egg, my interest was focused on carving, so I started to collect some information about carving on the Internet (patterns, tools, etc.). Finally I found a local guy who prepares carving tools. I visited to this guy and bought some carving knifes. He was very kind and also sold me some pre-prepared material to start my activity. It was some lime tree and he told me that this is most suitable for a beginner.

So, I had the lumber and the tools. After some chip carving practice I decided to create some glass pads to our coffee table. I wanted a simple design of folk style and the result is the following:

Carved glass pads

Wednesday, December 10, 2008

Wooden Egg - The Beginning

One day a realized that I am spending too much time in front of the computer, especially after working hours. I started to look for a new hobby which is not related to the computer science. For a long while I have been thinking how good it would be to make things of wood. I did not have too much experience with woodworking and I also did not have any tools to try it, but I decided to create something easy. At that time the only usable wood at home was a piece of pine with about 5 cm x 5 cm x 10 cm dimensions. I wanted to create a small, easy object which did not require special tools and experience and could be done from the source material. So my plan was to make a wooden egg.

I did not have any special carving tools to get out the shape from the log. So firstly I had to research the whole house to find something usable for the task. The only suitable tool was a Swiss army knife.

I started to carve with youthful enthusiasm, but soon I had to realize that pine is not the best wood to carve and also the Swiss army knife has a very uncomfortable grip (at least I felt like MacGyver), but I did not give up. The result was something like an egg:

Wooden egg