Pages

Tuesday, January 29, 2013

Toy Mouse

Nothing special just a small wooden toy to my daughter. 


I had a huge trunk of cherry tree, which was cut out from the garden last year. After several hours of sawing, finally I cut out a small block, and started carving a mouse shape. With chisels I made some rough work, but most of the work made by using knifes. 


When finished the carving it was sanded to have a smooth surface. The noose, mustache and eyes were burned with a piece of red hot iron. 

Tuesday, January 22, 2013

Doll's bed

My daughter got a new a new toy doll for christmas. This inspired me to create a bed for the doll.


The sides and the legs are joined by a stub tenon joint. To create this type of joint was more difficult than I thought firstly.  The small legs can be cracked very easily. Anyway, lesson learned: no force at all should be used when working with small pieces of wood.


First test with the doll:


It does not have any varnishing, my wife will find out the final color or cover.

Tuesday, November 20, 2012

Doghouse

Our family just have a puppy. She is Ilka, a little komondor:


When she grow up she will be a quite big dog, about 50 kg. This size of dog is not welcomed inside our house, but as the winter season is coming she need a place against rain and snow.

The doghouse project was accepted by the family. We asked the breeder about the recommended sizes of it and went to buy the lumber.

The design was quite simple it was almost a box, with a simple roof. This type of dog has a strong fur, so the doghouse did not required a special layout to keep the warm inside.

Firstly I created a rack.


Than the bottom and the sides were covered.


My daughter also gave me some useful hands.


Finally I covered and painted the roof. The sides just have some rape-oil, to not disturb the noose of the dog.


The house is still big for Ilka, but in the last 5 week she almost doubled her size.

Wednesday, August 29, 2012

Stool

A long time without posts. My daughter is growing up, she left the cradle and started walking. While she is walking in the house she is trying to sit everywhere what is fit's her size. By now all of our paper boxes are compressed and this inspired me to create a stool for her.

The design is is quite simple, a hole on the top, dovetailed legs and one crossing bar to make it more stable. Here is the finished stool:


The accessories:


Saturday, April 2, 2011

Bookshelf

My Wife sewed a home wall hanging pocket organizer into the baby's room. The idea was to create a self with a bar on it's bottom to hold the organizer.

The self was made of the same material as the cradle to fit with it. And also the arch on the top follows the same angle as the legs of the cradle. The shelf required two shoulders at the end to prevent items from falling down.


Front view:
Top view:


Thursday, March 3, 2011

Hanging cradle

My girlfriend became my wife, and we are expecting a baby. This inspired me to create a bed or a cradle for the new family member. After checking some articles we chose the cradle. Because the continuous movement provided by a cradle stimulates the baby's nervous system and it is developing better, than in a simple bed.

There are basically two types of cradles, one is the rolling (classic) cradle, which is rolling on its foot, and the hanging one which is hanged up by ropes. The first one is able to move into only one direction while the latter can move into more . We decided to choose the hanging one.

After drawing some plans I was a bit scared, because until that time, this was my biggest project on my woodworking way. I also needed to get some new tools to create long flat surface or convex arcs.

First I made the scaffold, which is basically two legs connected with two beams - one at the top and a smaller one on the bottom. The base of the legs are rounded and a column is glued into them. The beams are fixed with chocks. The parts of the scaffold can be seen in the following picture:


Next step was the basket part of the cradle, exactly its sides. The sides were a grid with lot of small items, it took a while until I cut and shaped to join exactly these items. The top bars had a small arch. The components of this grid can be seen in this picture:


When the sides were assembled, I needed to cut and join the bottom sticks, it also needed some chiselling to fit them correctly. When it was ready only the face and the back sides were left. These sides were arched in the same angle as the leg of the scaffold. The items of theese steps are on this picture:


When it was done and all the components were ready, without assembling they look liked this:


When everything was done It just needed to be hanged on with a rope and insert the mattress. (Unfortunately it was placed in our small room, so I did not have a chance to get a good viewpoint for the pictures):


And from top view:

Sunday, December 12, 2010

Doll-house furniture

My niece is going to have a doll-house for Xmas. Her mother asked me to create some furniture into the children's room. They needed a wardrobe, a bed and a cradle.

Doll-house furniture
The main parts of them were made of lime tree, bottoms from plywood. The doors of the wardrobe can be opened and it has one shelf inside. The cradle is rolling quite smoothly.

I did not make any finishing to let them choose the proper color which will fit to the other parts of the doll-house.

Wednesday, December 1, 2010

Wooden Trash Bin

We have quite slight free place in our kitchen, but I wanted to eliminate the mass we produce with a selective trash collecting. So we needed a trash bin which is slim enough to put it next to the wall and able to collect plastic and paper waste separately.

The design is quite simple, it just a simple box with removable top.


In the inside there are small hooks to hang plastic bag and hold the waste.

Sunday, November 21, 2010

Oskar Knot 12

This is one of Oskar van Deventer's classic puzzle designs. I found the plans on the Pacific Puzzleworks's site.

I did not have to much experiences with making of wooden puzzles, but I thought this simple structure would worth a try.

Tuesday, November 2, 2010

Wooden Salt Holder

I made a salt holder for my mother as a gift. The design was quite simple, but still nicer than her old plastic one.
Wooden salt holder
It was made of a piece of pear wood which was cut out from her garden last year. Firstly I cut a block of wood and than saw around the shape. Then I shaped to the final form with chisels and carving knifes. At the end it was sanded and covered with oil. It was not too complicated and can be done within some hours.

Monday, October 25, 2010

Mailbox

This mailbox is going to be a gift for my girlfriend's parents . They needed a relatively big one to be able to swallow an A4 sized envelope and several newspapers.


Firstly, I had to cut the lumber into proper size. The corners are jointed in 45 degree angles, so I planed the edges into 45 degree. It took some time until I got them to fit correctly.


When it was ready I glued the pieces together and the maibox had its shape:


Then I put the roof on the top of the mailbox:


When it had its final form, I shaped out the nameplate:


Then carved the name and address into the nameplate:


To get more contrast for the text, it was burnt with a soldering-iron.

When it was ready, only finishing was left. It was an UV resistant outdoor stains in 2 layer, I hope it will be good for a while because it had a terrible smell. Now it looks like this:


Originally It had a leg, but it was easier to use a squared iron to fix it to its final place.

Sunday, September 12, 2010

Sliding Bevel Gauge

Sliding bevel gauge is an adjustable gauge for setting and transferring angles. It does not require a lot of material so it can be made of any remaining wood and the structure of the tool is very simple, it could be made quite quickly.

I cut 2 thin slices of wood, one for the handle and the other for the blade. I cut the first one into 2 parts and cut down a small piece in 45 degrees from the blade. I glued them together to have the handle. After I made several holes in the blade to get the sliding are. At this moment it looked like this:

Sliding Bevel Gauge


The most difficult thing was to find a special screw which can be twisted easily by hand. After some searching I found a proper one. I applied some oil on the wood and put it together.

Sliding Bevel Gauge

Monday, April 12, 2010

Bookend

We have an open bookshelf which is not fully filled with books, and on the brink there was nothing to keep the books standing. This inspired me to create a bookend to maintain order on this shelf.

The plan was a "pushing man" holding the books. For this I needed two pieces of flat wood joined together in 90 degrees and a figure who is connected to these pieces.

I wanted a strong holding for the joint, but I did not want it to be visible. So I decided to use a blind dovetail join.

Full blind dovetail join


This was one of my first joints, so it took a long time (almost a whole afternoon) to create proper shape of the pieces, but finally they fit quite well.

When I had the joint I just needed a figure. I wanted a simple, not too detailed one who is just struggling with the books. I glued together some pieces of wood and carved a simple figure. When it was ready I glued his legs to the base and his hands to the vertical part of the bookend.

The following picture shows it in action:

Bookend

Friday, February 12, 2010

Marking Gauge

After some small projects I realized that exact markings are very important in woodworking. It can save a lot of time especially if I have to correct some error because of the "lazy" sketch drawings. So I decided to create some layout tools to make the work easier. I did not want to go to the first shop an buy a set of layout tools because I enjoy working more with the ones I made.

The marking gauge was the first choice to create. I found a detailed article in the Popular Woodworking magazine about this tool.

I found a piece of beech tree and followed the construction description of the download-able PDF version. For the pin I used a simple sharped nail. I was a bit afraid of loosing it's edge soon, but after several tests it still had it.

Marking gauge

Sunday, September 13, 2009

Keepsake Box

While I was surfing on the Internet I found the following Keepsake box. I liked the closing system of this box and also found it quite simple to create a similar one. I did not want to make an exact copy of the original one, I wanted a bit higher one and to decorate the top with some carving.

Creating the dovetail sliding seemed very easy on the video, but I do not have a router table, so I had to figure out something else. Firstly I wanted to create this by cutting out the dovetail hole with a saw and clean out it wit chisels, but soon I realized that I didn't have enough manual skill to make it perfectly flat to allow the other part sliding smoothly in it. So I decided to make the top from 3 parts and glue them together. It also took a while to plane the parts of the top in the exact angle to fit well, but it was much easier and flattering than using chisels.

When I was ready with the top and the bottom, I created the corners and the remaining part of the dovetail from a different type of wood to have some pattern of the materials.

Finally I carved a small flower pattern to the top of the box and finished with varnish. With the carving on the top of the box has the following looking:

Keepsake box


One more shot from a different angle:


Finally an opened view:

Wednesday, August 12, 2009

Jewelry Box

Since I have started working with wood my girlfriend was always pushing me to create a jewelry box for her, even if she does not have too much jewelries. I thought this is a compulsory task for every man who has started to do anything of wood.

I did not have any experience with box creating and joinery so I asked some help from an experienced one of my relatives and also had proper tools for cutting and planing. So he helped me to create the box.

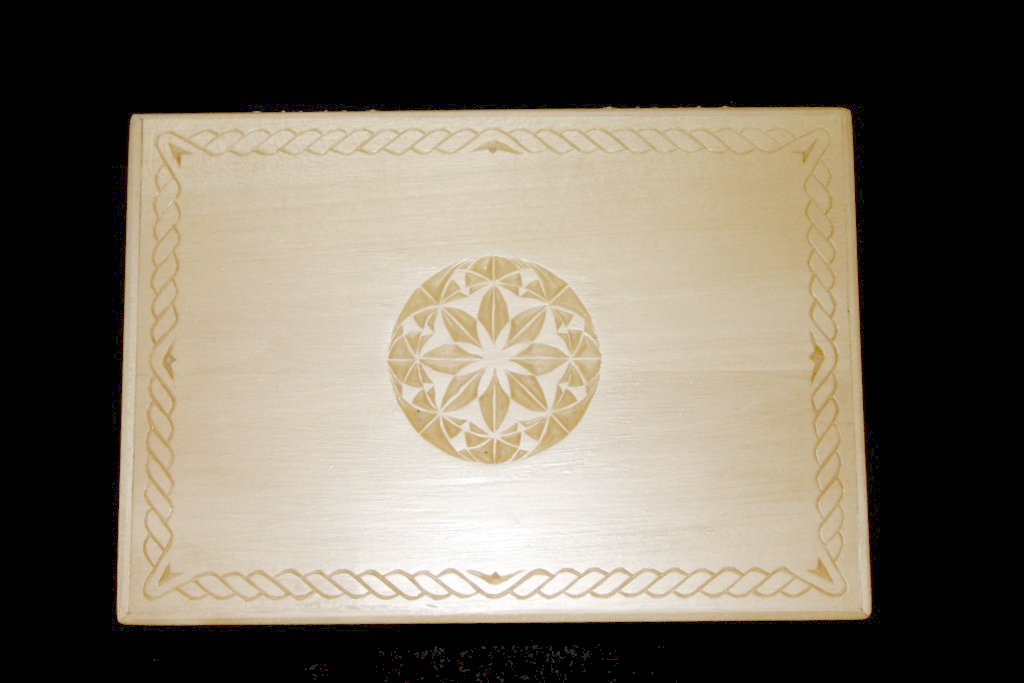
When it was ready I just wanted to put some simple but nice carving on the top. I draw several patterns and borders and finally I chose this one:

Carved jewelry box


I also covered the bottom of the box with some soft material:


And also the drawers:


Finally I put a hinge between the body and the top:

Wednesday, March 25, 2009

Salad Spoons

After my previous spoon and the paddle I realized that these kind of things are not really usable, at least nowadays, and I don't have place for them in my flat, because they are not really in harmony with the style of it. I wanted to make something more useful and usable thing.

My girlfriend is a vegetarian and she would be pleased with a pair of salad spoons, so I had the plan. I just needed some material to do it. I had only some soft wood for carving, but those were not good for everyday usage, I wanted some harder wood. I remembered that last year my parents, who are living on the countryside, had cut down some bigger branches from their nut tree and these branches are just drying under a roof and waiting to be burnt . So I thought some of them would be good for this task. Next time when I visited them, I checked these branches and I found a trunk which can provide me a pair of spoons. I cut into two pieces and draw the design of the spoons on the wood. With a jigsaw I cut the shape of the spoons following the lines and with knives I carved to the final shape. At the end I sanded them and covered with some paraffin oil.

Wooden salad spoons

Wednesday, March 11, 2009

Wooden Spoon

While I was surfing on the Internet I saw a lot of nicely carved wooden spoons. I decided to create one. I took a piece of alder wood and created a simple design.

Tuesday, February 10, 2009

Paddle

I am not a big folk fan, but a paddle could be a good task for practice. The material was shaped, I just had to do the carving. I searched a lot on the Internet for patterns and samples. When I had a larger collection of the patterns I tried to draw a composition of folk motives on the surface of the wood. This was the hardest part, the carving was much easier than I expected.

Finally I had this:


And the other side:

Tuesday, January 20, 2009

Glass Pads

After warming up with the wooden egg, my interest was focused on carving, so I started to collect some information about carving on the Internet (patterns, tools, etc.). Finally I found a local guy who prepares carving tools. I visited to this guy and bought some carving knifes. He was very kind and also sold me some pre-prepared material to start my activity. It was some lime tree and he told me that this is most suitable for a beginner.

So, I had the lumber and the tools. After some chip carving practice I decided to create some glass pads to our coffee table. I wanted a simple design of folk style and the result is the following:

Carved glass pads