Pages

Sunday, December 12, 2010

Doll-house furniture

My niece is going to have a doll-house for Xmas. Her mother asked me to create some furniture into the children's room. They needed a wardrobe, a bed and a cradle.

Doll-house furniture
The main parts of them were made of lime tree, bottoms from plywood. The doors of the wardrobe can be opened and it has one shelf inside. The cradle is rolling quite smoothly.

I did not make any finishing to let them choose the proper color which will fit to the other parts of the doll-house.

Wednesday, December 1, 2010

Wooden Trash Bin

We have quite slight free place in our kitchen, but I wanted to eliminate the mass we produce with a selective trash collecting. So we needed a trash bin which is slim enough to put it next to the wall and able to collect plastic and paper waste separately.

The design is quite simple, it just a simple box with removable top.


In the inside there are small hooks to hang plastic bag and hold the waste.

Sunday, November 21, 2010

Oskar Knot 12

This is one of Oskar van Deventer's classic puzzle designs. I found the plans on the Pacific Puzzleworks's site.

I did not have to much experiences with making of wooden puzzles, but I thought this simple structure would worth a try.

Tuesday, November 2, 2010

Wooden Salt Holder

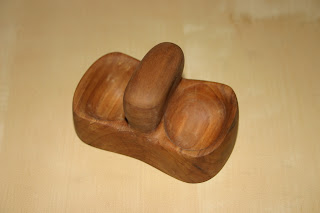
I made a salt holder for my mother as a gift. The design was quite simple, but still nicer than her old plastic one.
Wooden salt holder
It was made of a piece of pear wood which was cut out from her garden last year. Firstly I cut a block of wood and than saw around the shape. Then I shaped to the final form with chisels and carving knifes. At the end it was sanded and covered with oil. It was not too complicated and can be done within some hours.

Monday, October 25, 2010

Mailbox

This mailbox is going to be a gift for my girlfriend's parents . They needed a relatively big one to be able to swallow an A4 sized envelope and several newspapers.


Firstly, I had to cut the lumber into proper size. The corners are jointed in 45 degree angles, so I planed the edges into 45 degree. It took some time until I got them to fit correctly.


When it was ready I glued the pieces together and the maibox had its shape:


Then I put the roof on the top of the mailbox:


When it had its final form, I shaped out the nameplate:


Then carved the name and address into the nameplate:


To get more contrast for the text, it was burnt with a soldering-iron.

When it was ready, only finishing was left. It was an UV resistant outdoor stains in 2 layer, I hope it will be good for a while because it had a terrible smell. Now it looks like this:


Originally It had a leg, but it was easier to use a squared iron to fix it to its final place.

Sunday, September 12, 2010

Sliding Bevel Gauge

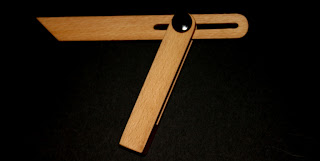
Sliding bevel gauge is an adjustable gauge for setting and transferring angles. It does not require a lot of material so it can be made of any remaining wood and the structure of the tool is very simple, it could be made quite quickly.

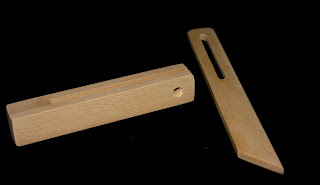
I cut 2 thin slices of wood, one for the handle and the other for the blade. I cut the first one into 2 parts and cut down a small piece in 45 degrees from the blade. I glued them together to have the handle. After I made several holes in the blade to get the sliding are. At this moment it looked like this:

Sliding Bevel Gauge


The most difficult thing was to find a special screw which can be twisted easily by hand. After some searching I found a proper one. I applied some oil on the wood and put it together.

Sliding Bevel Gauge

Monday, April 12, 2010

Bookend

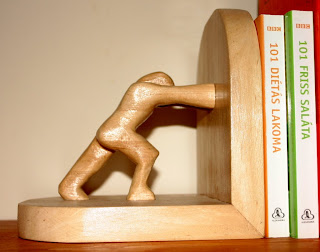
We have an open bookshelf which is not fully filled with books, and on the brink there was nothing to keep the books standing. This inspired me to create a bookend to maintain order on this shelf.

The plan was a "pushing man" holding the books. For this I needed two pieces of flat wood joined together in 90 degrees and a figure who is connected to these pieces.

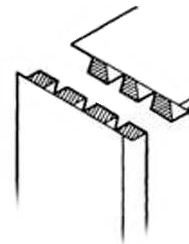
I wanted a strong holding for the joint, but I did not want it to be visible. So I decided to use a blind dovetail join.

Full blind dovetail join


This was one of my first joints, so it took a long time (almost a whole afternoon) to create proper shape of the pieces, but finally they fit quite well.

When I had the joint I just needed a figure. I wanted a simple, not too detailed one who is just struggling with the books. I glued together some pieces of wood and carved a simple figure. When it was ready I glued his legs to the base and his hands to the vertical part of the bookend.

The following picture shows it in action:

Bookend

Friday, February 12, 2010

Marking Gauge

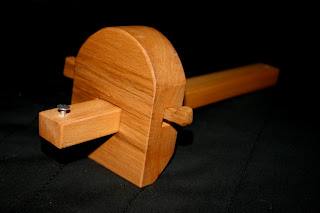
After some small projects I realized that exact markings are very important in woodworking. It can save a lot of time especially if I have to correct some error because of the "lazy" sketch drawings. So I decided to create some layout tools to make the work easier. I did not want to go to the first shop an buy a set of layout tools because I enjoy working more with the ones I made.

The marking gauge was the first choice to create. I found a detailed article in the Popular Woodworking magazine about this tool.

I found a piece of beech tree and followed the construction description of the download-able PDF version. For the pin I used a simple sharped nail. I was a bit afraid of loosing it's edge soon, but after several tests it still had it.

Marking gauge